Free Graduation Presentation for Teachers
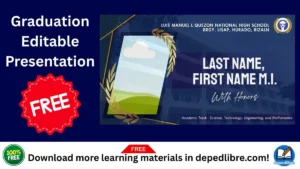
Free Graduation Presentation for Teachers ( Free Template)
Graduation day is one of the most emotionally charged days of the academic year. For teachers, it is more than a ceremony — it is the culmination of months, sometimes years, of dedication, mentorship, and hard work. Yet, when it comes to preparing the graduation presentation itself, many educators feel overwhelmed by a blank slide and a ticking clock. Sound familiar?
The good news: you do not need a graphic design degree or a paid subscription to create a stunning, professional-quality graduation presentation. In this comprehensive guide, we break down everything teachers need to know — from finding the best free graduation presentation templates to crafting slides that genuinely move your audience. We have done the research so you can focus on what you do best: inspiring students.
Quick Takeaway: A well-designed free graduation presentation can save teachers 3-5 hours of prep time, reduce design stress, and leave a lasting impression on students, parents, and administrators. |
Why Teachers Need a Great Graduation Presentation (It Is More Than Just Slides)
Before we dive into templates and tools, let us take a moment to understand why the graduation presentation matters so much. Many teachers underestimate its impact, treating it as a formality. But the slides you show during a graduation ceremony serve several critical purposes:
- Sets the emotional tone: A well-crafted slide deck creates an atmosphere of celebration, reflection, and excitement about the future.
- Honors students publicly: Featuring student names, photos, or achievements on slides makes graduates feel seen and celebrated — a memory they carry forever.
- Communicates to parents: Parents and families in the audience connect deeply with visual storytelling about the academic journey.
- Reflects the school’s brand: A polished presentation elevates the reputation of your school or classroom.
- Creates a lasting record: Slides can be exported, printed, or shared digitally as a keepsake long after the ceremony ends.
What Makes a Great Graduation Presentation? A Teacher's Checklist
Downloading a beautiful template is just the starting line. The magic happens in how you personalize and structure your content. Here is a teacher-tested checklist to help you build a graduation presentation that genuinely resonates:
Structure: The Winning Slide Order
- Opening / Welcome Slide — School name, graduating class year, and a celebratory image or quote
- A Look Back — Photos or highlights from the academic year (field trips, projects, milestones)
- Student Spotlight Section — Individual or group recognition slides (names, photos, achievements)
- Message from the Teacher — A heartfelt, personal note from you to your students
- Awards and Honors — Certificates, special recognitions, academic distinctions
- Looking Ahead — Inspirational quotes and encouragement for the next chapter
- Thank You Slide — Acknowledging parents, support staff, and the community
- Closing / Farewell Slide — School logo, contact info, or a memorable image
Design Tips That Make Your Free Template Look Premium
One of the biggest fears teachers have is that a free template will look… free. Here are five design upgrades that take any template from generic to genuinely impressive:
- Stick to 2 fonts maximum: Most free templates come with pre-selected fonts. Resist the urge to change them all. If you do customize, pick one display font (for titles) and one readable font (for body text) and stay consistent throughout.
- Use high-resolution photos only: Blurry classroom photos ruin an otherwise polished presentation. If device cameras are limited, tools like Canva’s built-in photo editor can sharpen images before you add them.
- Match your school’s color palette: Look up your school’s official hex color codes and update the accent colors in your template. This small change makes the presentation feel intentional and branded.
- Keep text minimal on each slide: Graduation audiences are there to feel something, not read paragraphs. Aim for 6 words or fewer per headline and 2-3 bullet points per content slide.
- Use slide transitions sparingly: One consistent transition (like a soft fade) looks polished. Mixing multiple transitions looks chaotic. Less is always more on graduation day.
Share to your friends!
Free Graduation Presentations by Education Level: What Works Best
Teachers across all grade levels share one goal — celebrating their students — but the tone and content of a great graduation presentation varies significantly by age group. Here is a practical breakdown:
Education Level | Recommended Tone | Key Slide Types | Template Style |
Preschool / Kindergarten | Playful, warm, colorful | Photo collage, fun stats, cute quotes | Bright, cartoonish designs |
Elementary School | Celebratory, nostalgic | Year highlights, class memories, awards | Colorful with school theme |
Middle School | Motivational, fun | Student spotlights, future goals, inside jokes | Modern, energetic layouts |
High School | Formal yet personal | Individual achievements, stats, future plans | Elegant, cap-and-gown style |
College / University | Professional, inspiring | Department highlights, career readiness | Minimalist, sophisticated |


Step-by-Step: How to Build Your Free Graduation Presentation in Under 60 Minutes
The biggest mistake teachers make is starting from scratch. With the right free template and this step-by-step workflow, you can have a complete, polished graduation presentation in one sitting.
- Step 1 — Choose Your Platform (5 min) — Based on the comparison table above, select your platform. If you need it fast and free with no sign-up, go SlidesCarnival. If you want maximum visual control, open Canva.
- Step 2 — Select Your Template (5 min) — Filter by ‘graduation’ or ‘ceremony’ themes. Choose a template that matches your school level and the emotional tone you want — formal or festive, classic or colorful.
- Step 3 — Outline Your Slide Content (10 min) — Before editing any slides, write a quick outline: what story do you want to tell? Map your content to the 8-slide structure outlined earlier in this article.
- Step 4 — Add Student Photos and Names (20 min) — This is the most time-consuming step but also the most meaningful. Collect photos ahead of time and organize them by student name to speed up this phase.
- Step 5 — Write Your Personal Message (5 min) — Draft your teacher message slide. Keep it genuine, specific, and brief. One or two heartfelt sentences beats a paragraph every time.
- Step 6 — Apply Design Polish (10 min) — Check font consistency, update accent colors to match school branding, remove any placeholder text, and run through the design tips from the section above.
- Step 7 — Rehearse and Export (5 min) — Run through your full presentation in slideshow mode at least once. Export as PPTX or PDF as a backup, and test it on the actual display equipment before the ceremony.
Disclaimer:
Some educational materials may be inspired by or aligned with DepEd curriculum standards.
However:
All materials uploaded or created are intended to support teachers and students.
If any copyrighted content is unintentionally shared, please contact us immediately for removal or proper attribution.
We respect intellectual property rights and respond promptly to valid copyright concerns.
Common Mistakes Teachers Make With Graduation Presentations (And How to Avoid Them)
Even experienced teachers fall into these presentation traps. Learning from common mistakes can save you last-minute stress and preserve the quality of your ceremony.
- Overloading slides with text: Graduation is a visual and emotional experience. If your slides look like a Word document, simplify ruthlessly.
- Forgetting to proofread student names: Misspelling a student’s name in a graduation presentation is painful for that student and their family. Triple-check every name.
- Using uncompressed images: Large image files can cause slideshows to lag or crash mid-ceremony. Compress photos using a free tool like TinyPNG before inserting them.
- Skipping the tech check: Always test your presentation on the actual projector, screen, or monitor used in the ceremony room. Colors, font sizes, and proportions can look very different on different displays.
- Ignoring accessibility: Use high-contrast colors and a minimum font size of 24pt to ensure that audience members in the back row and those with visual impairments can read your slides.
- Not saving a backup: Export your final presentation as both a PPTX and a PDF. If PowerPoint crashes, the PDF backup saves the day.
- Picking a template that does not match the mood: A bright, playful kindergarten template projected at a high school commencement feels jarring. Match the template energy to the age group and occasion.
- Adviser Files
- Aral Program Materials
- Brigada Eskwela Files
- COT Lesson Plans
- Daily Lesson Log (DLL)
- Deped Files
- Deped Modules
- Graduation Program/Files
- Homeroom Guidance Modules
- Matatag Curriculum Guide
- Matatag Lesson Exemplars
- National Learning Camp Files
- NAT Reviewer (New)
- Periodical Test (All Subjects)
- PowerPoint Game Templates
- Summative Tests/ Perfor Task
- Teacher Loans